My Boat/Lake Day Essentials!

Summer is in full swing and that means more beach/boat days ahead!

We’ve owned a boat for a little over 3 years now and I’ve defiantly learned that it is very important to keep and bring some essentials from home with you. Lord knows how many times I’ve forgotten something at home!

Below I’ve listed my favorite must haves when traveling to the beach for a lake or boat day. (Please note that I make a small commission based off any link purchases.)

1. SPF! SPF! SPF! SPF!

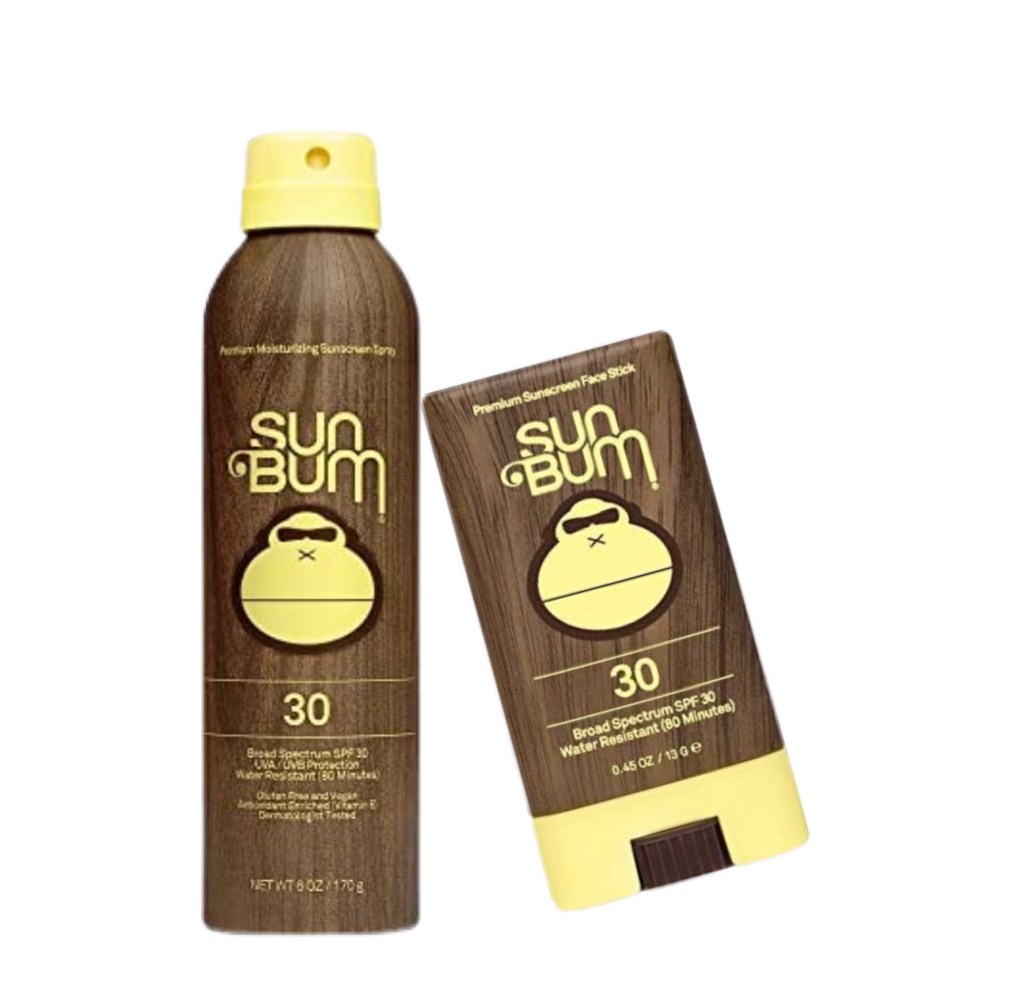
Sunscreen is a MUST out there on those hot days in the sun. I love Sun Bum’s line of products including their sunscreen stick! They also include for the kiddo’s too!

2. Lip Balm w/ SPF

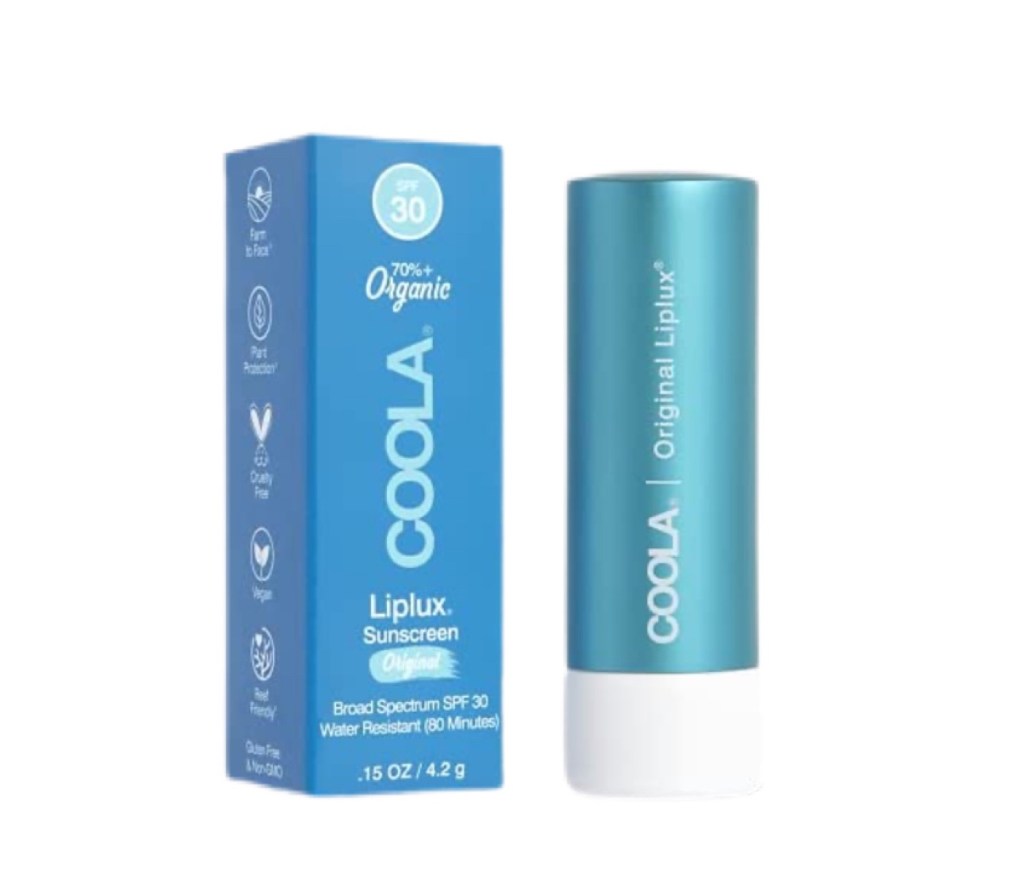
Again, can’t stop saying SPF! Lol okay I’m done.

3. Hair ties and clips

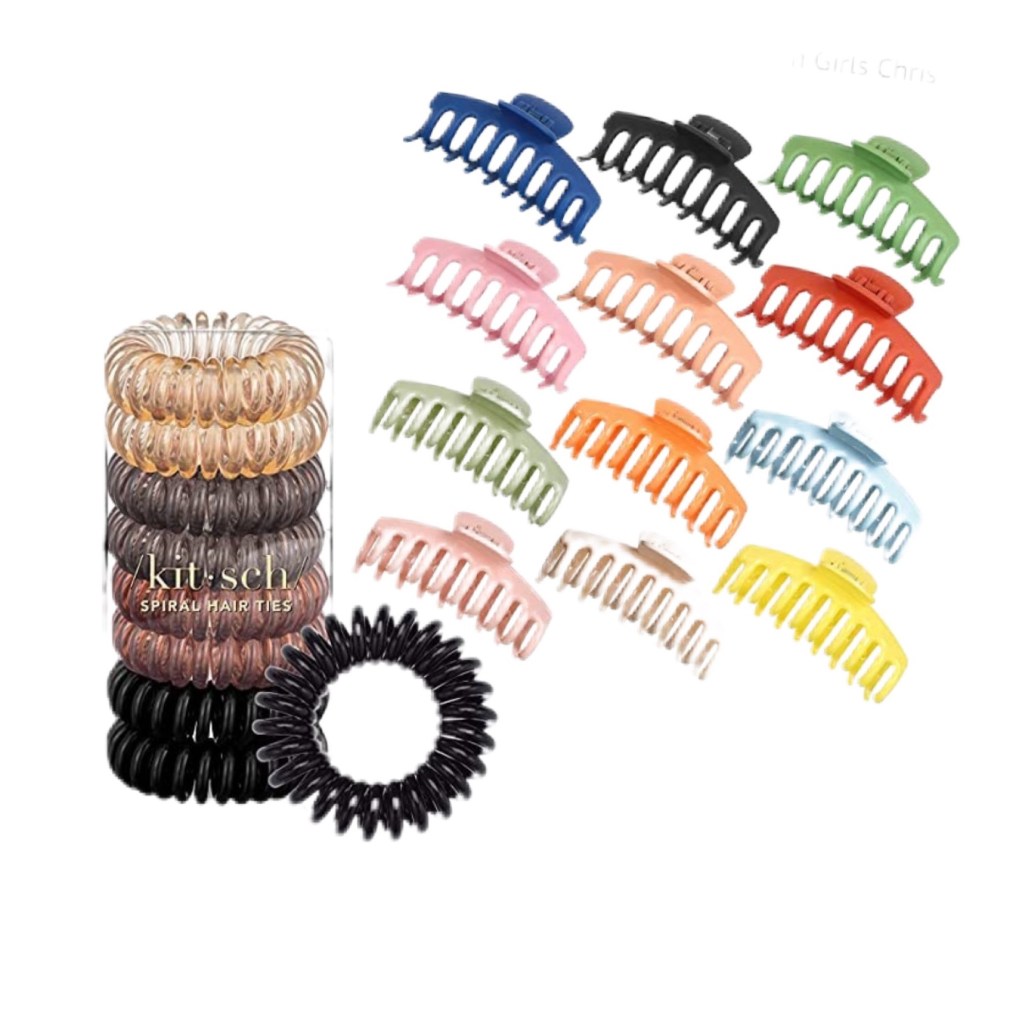
These clips were a huge trend this year and I had to jump on. They are seriously so cute and the colors are my favorite. This pack comes with 12 so I always have some packed in my beach bag.

You also can’t ever go wrong with a good hair tie. I keep these spiral ones on me at all times too!

4. Extra Large Beach Towel

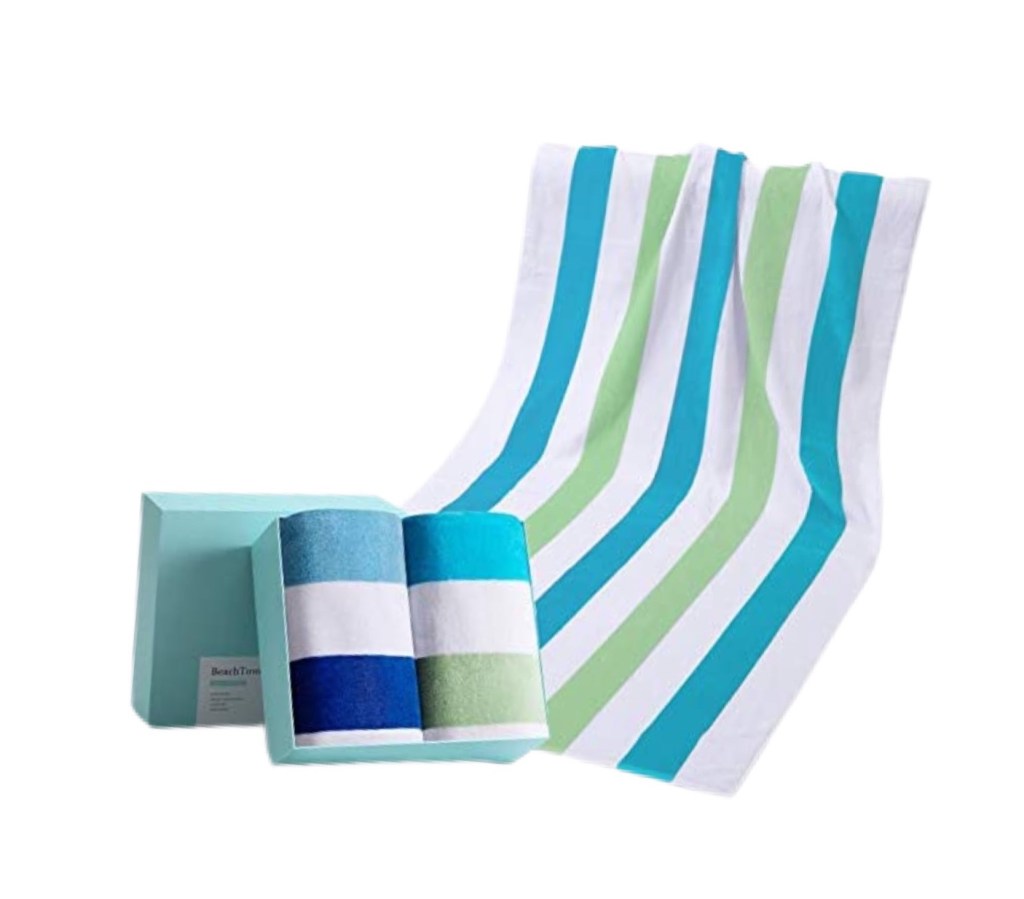
Gotta keep these bad boys always on hand. This one I found on Amazon comes in a pack of two and are so comfy and oversized which is perfect for those lazy beach days.

5. Water bottle

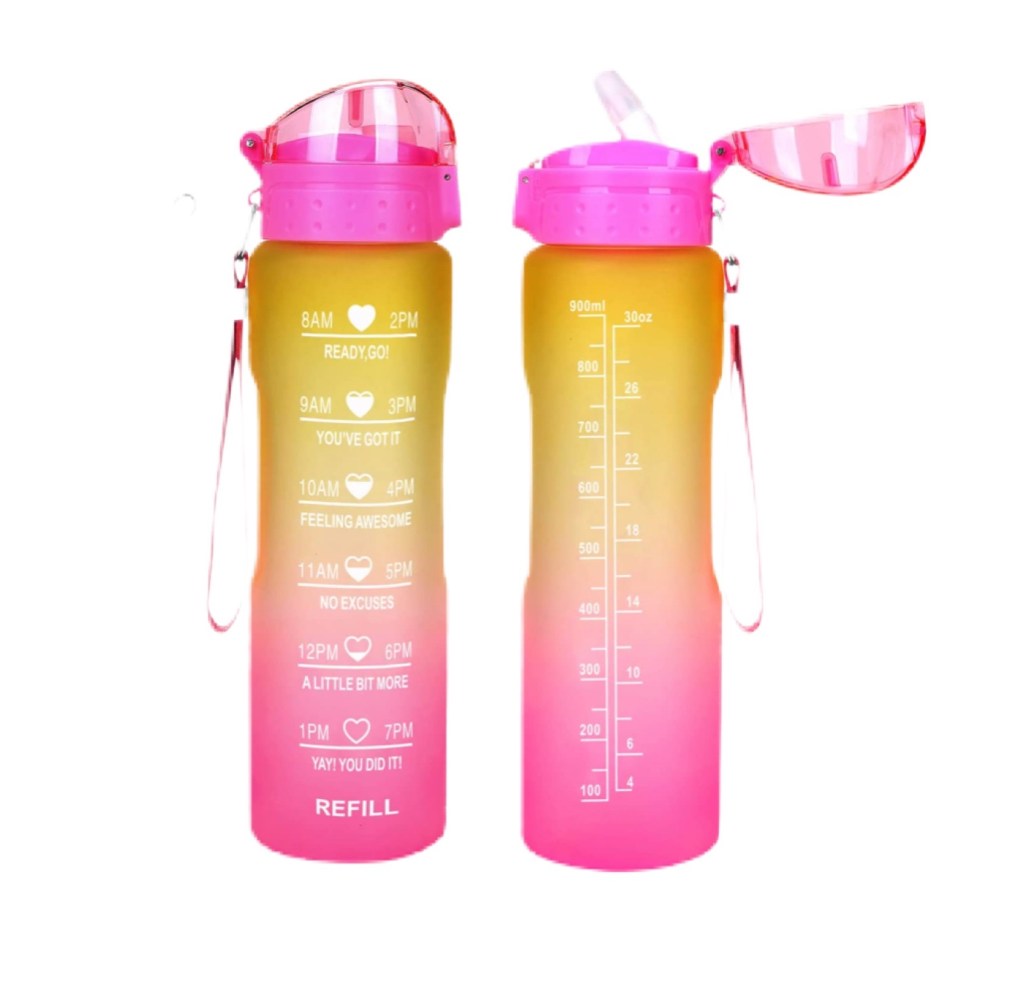
I try to stay hydrated as much as possible (in between my drinks) haha we all know lake days are fun but just a friendly reminder to keep yourself hydrated and cool! Fill it up and pack inside your cooler or bag for that extra H2O.

6. Floaties!!

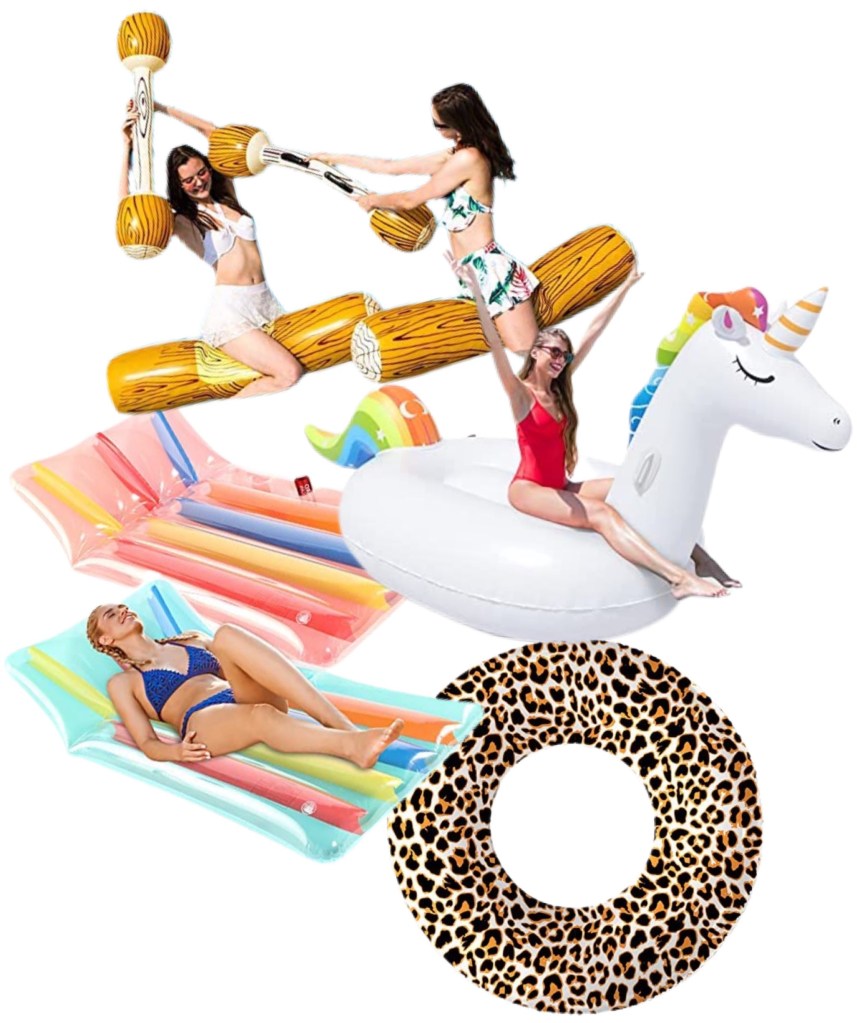
Floaties and games aren’t just for the pool! I’ve got plenty of these stashed in the boat and love buying more! I’m addicted 🤪 these super cute ones are Amazon and linked here!

7. The Beach Bag

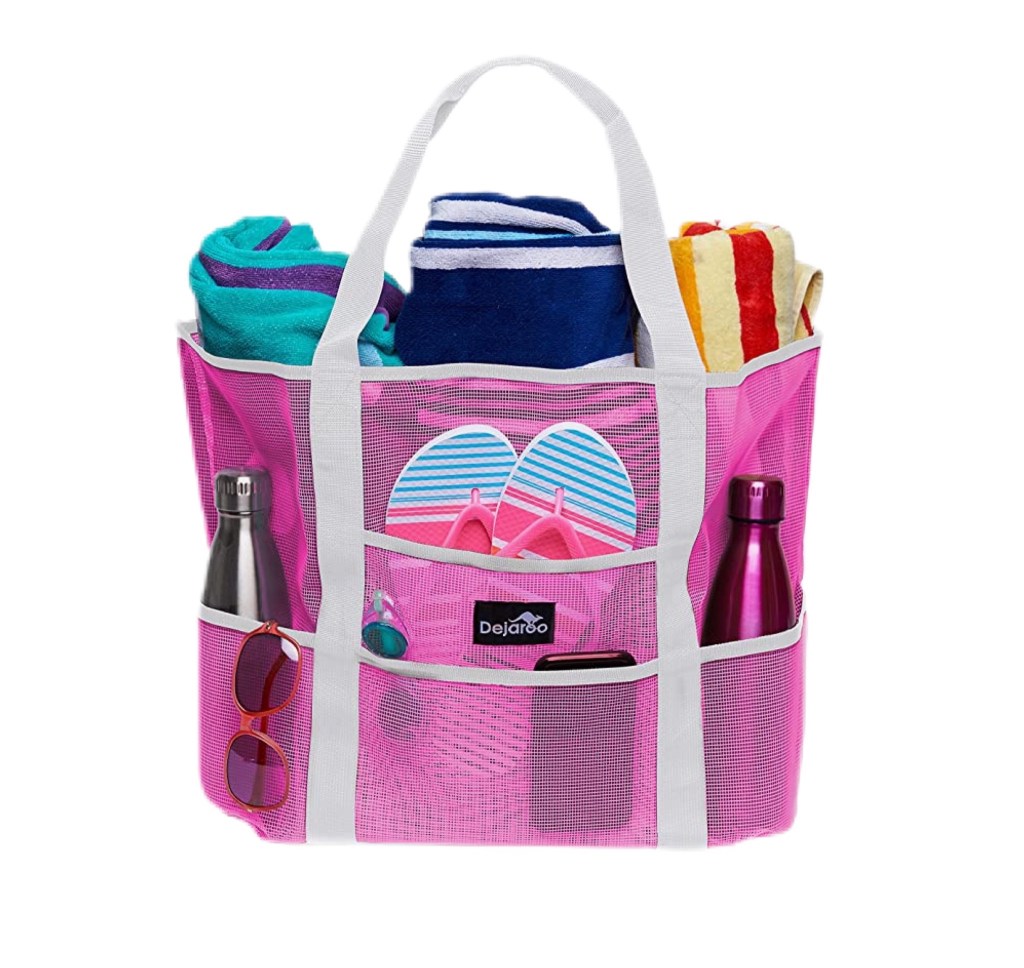
Last and certainly not least is the beach bag! I found this one on Amazon as well and I LOVE it! It’s perfect and fits pretty much all these essentials plus some extra space for anything else you wanna pack with you. This one also comes in so many different fun summer colors!

You can find everything listed in my Amazon page here or my Liketoknow.it!

Complete DIY No Reno Kitchen Remodel

When we moved to our little country home in 2018 I had this vision in my head of completely renovating the kitchen and creating the perfect farmhouse kitchen. However my head got the best of me when I had to think about the incredible budget we would have to put into this project that we just didn’t have. Discouragement lead me to then opening up to the idea of doing a non reno that was all DIY, not to mention completely budget friendly and even though it sounds scary, if you plan it right the whole project ended up being under $800. That’s insane! I’ll get into detail later but I couldn’t believe what a little tlc and just the slightest details could change our kitchen to something that I’ve wanted for so long!

First off I want to thank my amazing boyfriend for always going with my craziness of jumping from one project to the next and helping me put this project together. Couldn’t have done it without him! 💗

In the beginning of our moving process I actually repainted the kitchen counters to create a granite effect in which two years later I ended up just not loving anymore. It felt so outdated and I just wanted something more bright and refreshing. Of course I couldn’t afford new marble countertops so I did some digging and found the same brand that I used for the granite DIY had a kit for marble effect. It looked amazing in all the photos and I was so nervous because you have to create the marble lines yourself. But the kit gives you everything you need to be able to create it and after watching many YouTube videos later I made the purchase. The kit I used is the Giani Marble Paint Kit for $180. The kit contains the base white coat, marble paint, epoxy, brushes, rollers, and a practice board for before you begin. There is also a how-to video which teaches you the step by step instructions on how to paint on the marble effect. And y’all I couldn’t believe the results! It looked like I had brand new counter tops installed. I’ve gotten so many compliments. The whole painting process took one weekend and about 5 days for the epoxy to cure so be prepared to not use your counters for a week. I also recommend drawing out your design and researching what type of marble designs you want to use prior to starting. Pinterest was my best friend for that part.

Before DIY Marble Paint
Drawn layout design of how I wanted my marble veins to look

Of course after my new counters were done, I couldn’t stand the tiled backsplash that didn’t match the look that I was going for. I then decided to take to Pinterest once again and found that I didn’t have to demo my existing tile and replace it but instead could cover it with peel and stick backsplash. Again, I know the sound of peel and stick sounds scary but this is a non RENO remodel and I wanted something non permanent for this project. I used Peel and stick subway tile from Amazon at $31.99 a pack. I ended up needing 4 packs to cover my existing backsplash. During putting them up I had no doubt in my mind they would be falling off anytime soon as they were super sticky and I couldn’t remove it once I had a section in place. If you feel you need some extra help I also linked up a spray adhesive you can use prior to sticking on the wall. I do have to say to be extra careful when using if you do choose that route. Be sure to also clean you wall or tile prior to placing! Also make sure that if it’s behind your sink to caulk the corners and where it meets the counters so water cannot get inside to cause it to pop off. I also make sure to dry the area after dishes. It’s been 3 months since the install and I haven’t seen any of it come off yet. *fingers crossed* *knock on wood*

Finished peel and stick tile

Once the two major projects of the kitchen were done my mind immediately went to “what project next?!” which was do I repaint the cabinets?? After some discussion with my boyfriend we decided to keep the integrity of the newer cabinets and keep what we had when we moved in and so I decided to just change the knobs and pulls and I’m so happy that we kept it that way. The new knobs gave the kitchen that new detail that made everything pop. And once that was done all we needed to do was install the new light fixture and change the outlets from a nasty yellow color to a brand new white. I added some new farmhouse decor which were mainly from Hobby Lobby and Target and I am so incredibly happy with the end results. I feel like I have a brand new farmhouse kitchen and did it spending a fraction of the price!

If you are interested in any of the products I used I’ve listed them all below and in my Amazon Storefront located in my discount codes/links page! Here are some more pictures of the finished results:

Featuring Gunner
Rug: Wayfair linked in my liketoknow.it
Horse framed picture from Hobby Lobby

My Amazon Page

Giani Marble Counter Paint Kit – $180

Peel and Stick Subway Tile – $31.99/pack

Adhesive Spray – $16

All decor items linked here!

SHEIN Swim Haul

Hi!! & welcome to my new blog! I’m so happy to finally have launched and give you all a more closer look at my styles, products, beauty, and daily life!

Since spring is finally here (woo!) these warmer days are gonna be sneaking up on us sooner and sooner and I HAVE to tell you about SHEIN’s clothing swimsuits. I have found my HOLY GRAIL of affordable swim sets and if you haven’t hopped on the bandwagon yet you should. PERIOD. They have so many styles and sizes including plus. I am for real when I say their suits are under $20 for both top and bottom! Okay, STEAL!

I typically wear a size medium in bottoms and a large in top but since you can’t really buy the pieces separately I chose a size large and never had a problem. ***Disclaimer – everyone’s bodies are different and please choose what is best for you!

I bought three different bikinis which I am so excited to wear this spring/summer out on the boat. The colors are beautiful and im loving the pastels! Also can’t go wrong with a cute little pair of studded sandals.

The light pastel polka-dot bikini is probably my favorite one! the straps tie together or you can untie them and hide them away in the inside for a strapless look too. The bottoms are high waist but suuuper cheeky, so if you aren’t comfortable with a little bum showing these probably aren’t for you. This one is a size large and TTS.

Second, is this neon green wrap top bikini. I say wrap because I’m not sure how else to describe it LOL. The top has adjustable straps and the bottoms are slightly high waist on the sides but doesn’t come all the way up in the front. I loved the ‘V’ shaped bottoms. These are a little less cheeky than the polka-dot, size large and TTS.

And last but certainly not least is the super adorbs leopard pink heart bikini. I LOVE the style of this one. The ruffle sleeves are probably my favorite. Bottoms are high waist and semi cheeky. I’m in a size large and TTS. All the bikinis pictured here come in plus sizes as well.

If you are interested in any of these bikinis, I have linked them up in my Liketoknow.it under the
“Discount codes/Links” page! Or you can click here!

xo, Coco